



Got a stack of empty coffee pods and no clue what to do with them? You’re not alone. Most coffee lovers toss the pods straight in the trash, but a quick rinse‑and‑split routine can slash waste and keep plastic out of landfills. In this guide you’ll walk through five clear steps: gather and prep pods, split them into plastic, aluminum, and paper, pick the right recycling path, turn the leftovers into garden goodies, and check what your city actually accepts. By the end you’ll have a repeatable system that fits any brand , Keurig, Nespresso, Tassimo, or Dolce Gusto , and you’ll feel good about each cup you brew.
Step 1: Gather Used Pods and Prepare for Disassembly
The first thing you need is a stash of used pods. Keep a small bin on your counter so you can drop each pod right after it cools. Let the pod sit for a minute or two; hot coffee can soften the foil lid and make it easier to peel. If you have a lot of pods, set aside a few minutes each week to empty the bin into a larger container.
Next, give each pod a quick rinse. A light spray under running water removes coffee oils that can attract insects in your compost. You don’t need to soak , a quick swirl for 5‑10 seconds is enough. While you rinse, check the pod’s plastic code (the number inside the recycling triangle). Most Keurig K‑Cups use #5 polypropylene, which many curbside programs accept. Nespresso capsules are aluminum with a thin plastic coating; the metal part can be recycled if you separate it.
When you finish rinsing, let the pods air‑dry on a clean towel. Dry pods are easier to handle and won’t stick together in your recycling bag. If you have a dishwasher, you can place a tray of rinsed pods on the top rack for a short cycle; just be sure the water temperature stays below 140 °F to avoid warping the plastic.
Now you have a pile of dry, clean pods ready for the next step. If you’re looking for a tool that speeds up opening, the rePodder™ lets you twist open the capsule and crush the aluminum into a flat disc that fits in a soda can for recycling. It’s handy for mixed‑brand households because it works on any standard‑size pod.
Why bother with this prep? A study of 42 home‑recycling methods found that the simple rinse‑then‑bin routine cuts plastic waste by 80 % compared with craft‑only repurposing ideas (Wikipedia). In other words, a few seconds of water now saves a lot of landfill later.
Step 2: Separate the Three Main Materials
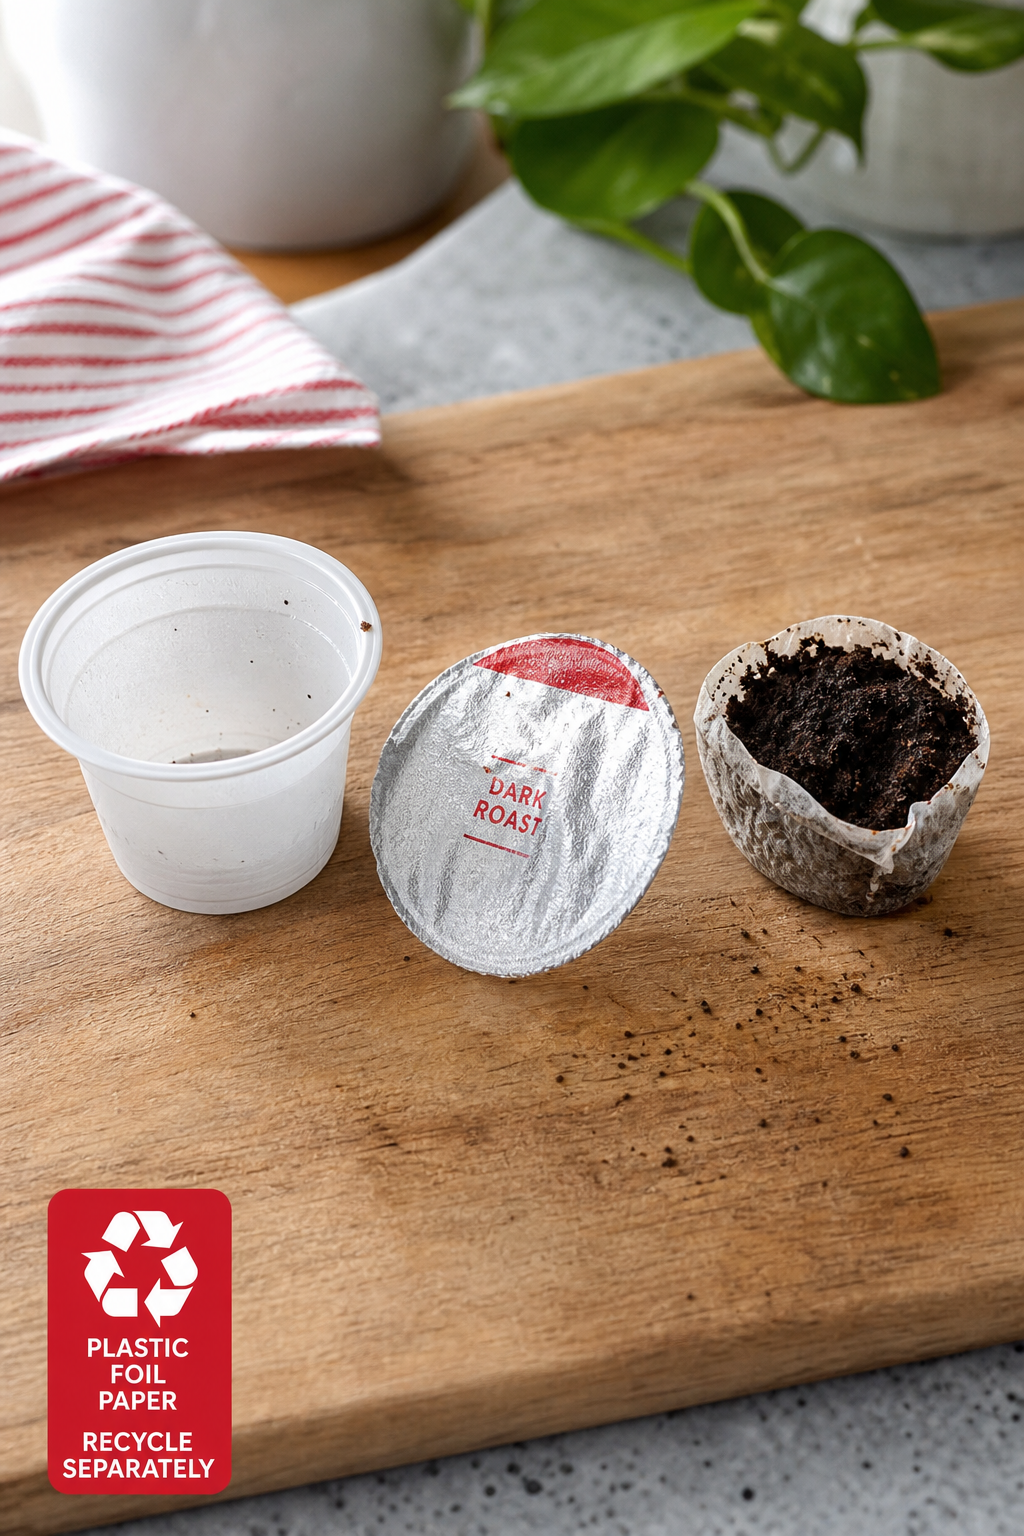
Each coffee pod is made of three distinct parts: a plastic cup, an aluminum (or foil) lid, and a paper filter that holds the grounds. Pulling these apart may feel fiddly at first, but a systematic approach makes it painless.
Start with the foil lid. Gently press a fingernail into the corner of the foil and lift. The foil should peel away in one piece. If it tears, use a small butter knife to nudge the edge open , be careful not to cut yourself.
Next, tackle the paper filter. Most filters sit just under the foil. Pinch the filter’s edge and pull upward. For stubborn filters, a quick puncture with a pin (like a safety pin) creates a tiny hole, letting you slip the filter out.
The remaining plastic cup is the biggest piece. Give it a once‑over rinse if any coffee residue remains, then set it aside for recycling. If the cup has a built‑in plastic ring or seal, you can pop that off with a pair of tweezers.
Now you have three clean streams:
- Plastic cup (usually #5 polypropylene)
- Aluminum foil lid
- Paper filter with spent grounds
These streams can be handled in different ways, which we’ll cover next.
Step 3: Choose a Recycling Method , Curbside, Mail‑Back, or Gadget
Now that you have the parts sorted, you need to decide how to send them off. The right choice depends on where you live, how many pods you generate, and whether you want to invest in a tool.
Option 1: Curbside recycling. Many municipalities accept clean plastic cups and aluminum lids in the regular recycling bin. The key is to rinse the plastic cup so it doesn’t stick to other items. The foil lid should be dry; a few municipalities treat foil as metal and will recycle it with cans. Check your local waste‑management website , for example, the Cuyahoga County guide says “do not place coffee pods in curbside recycling” unless you have removed the grounds and rinsed the cup (Cuyahoga County). If they accept the parts, you’re done.
Option 2: Mail‑back programs. Brands like Nespresso, Keurig, and Tassimo partner with TerraCycle’s “Podback” scheme. You request a free bag, fill it with used pods, and ship it back at no cost. The program crushes the aluminum and recycles the plastic at specialized facilities. This works well if you don’t have a curbside option for metal.
Option 3: Dedicated gadgets. Tools like the rePodder™ or the “Recycle‑a‑Cup” cutter let you separate and flatten aluminum in minutes. The cutter pushes a blade through the lid, releasing the foil and leaving a flat disc that fits in a soda can. Once crushed, the disc can be tossed with other aluminum cans.
Which method fits you?
- If you produce fewer than ten pods a week, curbside is simplest.
- If you brew dozens daily, a mail‑back bag saves trips to the recycling center.
- If you love gadgets, the rePodder speeds up separation and reduces the number of items you have to handle.
Below is a short video that walks through using a typical cutter tool. It shows the twist, the cut, and the final rinse , all in under a minute.
After you’ve chosen a path, set a reminder on your phone to empty the collection bin once it’s full. This keeps the workflow smooth and avoids a pile of stale pods.
Step 4: Up‑cycle Empty Pods into Garden Projects
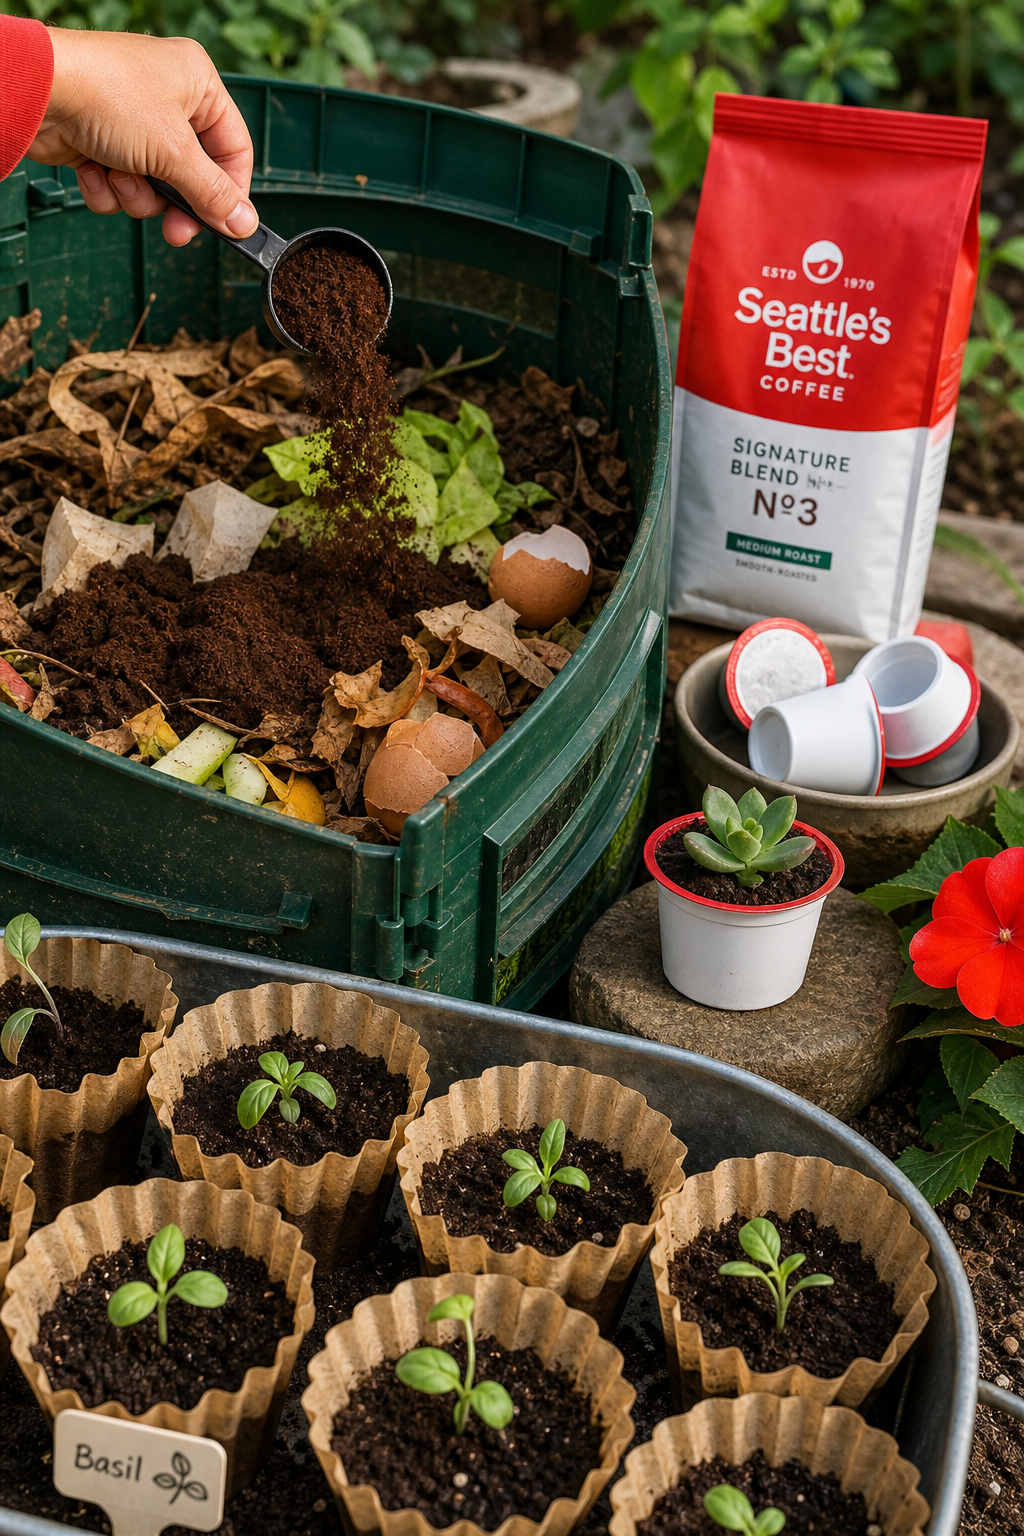
Even after you’ve sent the plastic and metal to recycling, the paper filter and coffee grounds can become garden gold. Coffee grounds add nitrogen to soil, improve drainage, and can deter slugs. The paper filter works as a biodegradable seed‑starter pot.
Here’s a quick garden hack:
- Fill the paper filter with a handful of fresh grounds.
- Place the filter in a small potting tray, add a pinch of soil, and press a seed into the center.
- Water lightly. The filter’s natural fibers hold moisture, and the grounds feed the sprout.
When the seedling develops two true leaves, pop the whole filter into your garden bed. The paper breaks down over weeks, leaving the plant rooted in nutrient‑rich soil.
If you have a larger batch of grounds, mix them with compost or add straight to a compost heap. Oregon State Extension notes that coffee grounds can boost soil health and help control slugs (Oregon State). Aim for a 1:3 ratio of grounds to other compost material to keep the mix from getting too acidic.
Another fun idea is to use empty plastic cups as tiny planters for succulents. Poke two holes in the bottom for drainage, fill with cactus mix, and plant a baby succulent. The cup’s shape mimics a pot, and you’ve kept plastic out of the landfill.
Chilled Iguana Coffee Co. loves sharing garden tips with its community. Their blog often highlights sustainable coffee‑related DIY projects, so you might find more ideas there.
For a deeper dive on reusable pod options, that discovers the best coffee pods for every taste and lifestyle. It explains which pods are made from recyclable or compostable materials, which helps you choose greener options from the start.
Step 5: Compare Municipal Recycling Programs & Pre‑Cleaning Rules
Not every city treats coffee pod parts the same way. Some accept only the plastic cup, others take both plastic and aluminum, and a few require you to strip the pod completely before it reaches the curbside bin.
Below is a quick comparison of three typical programs in the United States. The table shows whether the municipality accepts plastic cups, aluminum lids, and what pre‑cleaning steps are required.
When you’re unsure, search your city’s waste‑management portal for “coffee pod recycling.” The EPA’s recycling guide also lists best practices for small‑item recycling (EPA). If your local program says “no,” consider a mail‑back service or the rePodder gadget to make the pod size acceptable for metal recycling.
Remember to keep the grounds separate from the plastic cup. Mixing them can cause contamination, which may send the whole batch to the landfill.
By matching your habits to the rules in your area, you avoid the biggest pitfall , sending recyclable material to the trash because the local facility can’t read it.
Frequently Asked Questions
Can I recycle a Nespresso capsule in my regular curbside bin?
Most curbside programs only accept the aluminum part if you strip away the thin plastic coating and the coffee grounds. First, peel off the foil lid, then rinse the capsule. If your city’s guide lists “metal” as an accepted material, you can place the cleaned aluminum in the metal bin. Otherwise, use a mail‑back program like Nespresso’s free recycling bag.
What should I do with the paper filter after I’ve removed the grounds?
The paper filter is compostable. Add it to a backyard compost pile or a municipal green‑waste bin if your city accepts it. If you’re using a worm bin, the filter provides a nice carbon source that balances the nitrogen‑rich coffee grounds.
Is the “Recycle‑a‑Cup” cutter safe for kids?
The cutter has a spring‑loaded blade that only extends when the pod is fully seated, reducing the risk of accidental cuts. However, supervise children and keep the tool out of reach when not in use. The device’s manual recommends wearing gloves for added safety.
How many pods should I collect before using a mail‑back bag?
Most mail‑back programs let you fill a bag up to about 60 pods before you ship it. This size balances the cost of shipping (often free) with the convenience of fewer trips. If you have a small household, you might hit that limit once a month; larger families may need to send a bag every two weeks.
Do coffee grounds really help my garden, or are they just a myth?
Grounds add nitrogen, improve soil structure, and can deter pests like slugs. Oregon State Extension research shows that a thin layer of grounds (no more than ½ inch) mixed into topsoil boosts nutrient levels without making the soil too acidic. Over‑application can lead to a coffee‑scented smell that some neighbors dislike, so keep the layer light.
What if my city doesn’t accept plastic #5 pods?
When the local curbside service rejects #5 polypropylene, the best fallback is a mail‑back program. Brands like Keurig partner with TerraCycle to provide prepaid shipping labels. Alternatively, you can crush the plastic cup with a rePodder and place the flat disc in a regular plastics bin that accepts mixed‑plastic if your municipality has that option.
Can I reuse the same pod shell for multiple brews?
Reusable pod shells exist, usually made of stainless steel or BPA‑free plastic. They let you fill the shell with your own ground coffee, reducing waste dramatically. If you switch to a reusable shell, you still need to rinse the shell after each use, but you’ll eliminate the need for disassembly and recycling entirely.
How often should I clean my recycling bin to avoid odors?
Give the bin a quick wipe with a mild soap solution every two weeks. If you notice a sour smell, empty the bin, rinse it, and let it dry before refilling. Adding a few dryer sheets can help absorb moisture and keep odors at bay.
Conclusion
Recycling coffee pods at home isn’t a mystery , it’s a series of small, repeatable actions. Gather your pods, rinse them, split into plastic, aluminum, and paper, then choose the path that matches your city’s rules or a mail‑back service. Turn the leftover grounds into garden gold, and keep a simple checklist so the habit sticks. By following these steps you’ll cut down on landfill waste, give your garden a nutrient boost, and enjoy the peace of mind that comes from a greener coffee routine.
If you want more ideas on sustainable coffee habits, on eco‑friendly brewing techniques. Happy brewing, and happy recycling!